
Introduction: The Magic of the Tagine
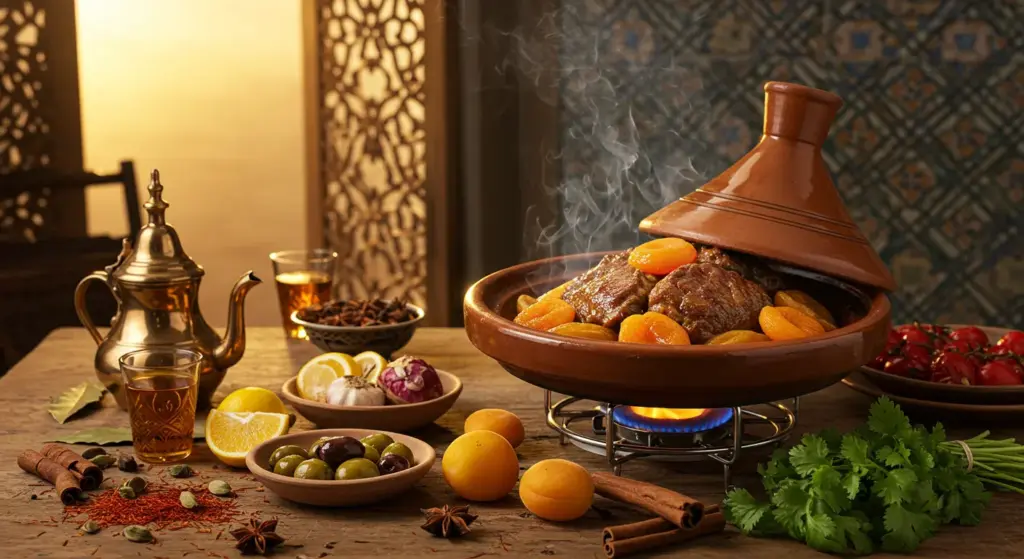
What transforms simple ingredients into a symphony of flavors that dance on your palate? The answer lies in the ancient art of tagine cooking—a culinary tradition that has captivated food lovers for centuries. This distinctive Moroccan cooking pot, with its iconic conical lid, creates a unique cooking environment where moisture circulates perfectly, flavors intensify naturally, and tough cuts of meat become fork-tender delicacies.
Unlike conventional cooking methods, tagine cooking tips revolve around the principle of steam circulation and slow, gentle heat. The conical design isn’t just aesthetically pleasing—it’s a masterpiece of functional engineering that traps steam, allowing it to condense and drip back into the dish, creating a self-basting environment that locks in nutrients and amplifies flavors.
This comprehensive guide will take you from tagine novice to confident cook, covering everything from how to use a tagine effectively to mastering advanced techniques that will impress even the most discerning palates. Whether you’re drawn to the cultural significance of this traditional Moroccan cooking pot tips or simply want to expand your culinary horizons, you’ll discover actionable insights that transform your cooking experience.
Authored by culinary anthropologist Sarah Martinez, who has spent over 15 years studying North African cuisine and training with traditional cooks in Morocco’s Atlas Mountains.
Chapter 1: Understanding Your Tagine
Types of Tagines: Material Matters
The foundation of great tagine cooking begins with understanding your equipment. Not all tagines are created equal, and the material you choose will significantly impact your cooking results.
| Tagine Type | Pros | Cons | Best For |
|---|---|---|---|
| Unglazed Clay | Authentic flavor, excellent heat retention, porous surface allows steam circulation | Requires careful seasoning, fragile, needs heat diffuser | Traditional recipes, slow cooking |
| Glazed Clay | Easier to clean, decorative, good heat retention | Less authentic flavor development, can crack with temperature changes | Beginner-friendly cooking, serving |
| Cast Iron | Durable, excellent heat distribution, stovetop to oven versatility | Heavy, requires seasoning, expensive | Searing, high-heat cooking |
| Ceramic | Easy maintenance, attractive presentation, dishwasher safe | Poor heat retention, less authentic results | Serving, casual cooking |
The Science Behind Clay Tagines
What makes unglazed clay tagines special? The porous nature of clay allows steam to pass through microscopic channels, creating a unique circulation pattern. As steam rises to the cone, it condenses and drips back down, but not before the clay absorbs and releases moisture gradually. This creates a more complex steam environment than sealed cooking methods.
Choosing the Right Tagine
When selecting your tagine, consider these factors:
- Size: 10-12 inches for families of 4-6 people
- Source: Purchase from reputable Moroccan importers or established cookware brands
- Authenticity: Look for handmade marks and slight imperfections—signs of authentic craftsmanship
- Fit: The lid should sit snugly but not create an airtight seal
Anatomy of a Tagine: Form Follows Function
Understanding each component helps you use your tagine effectively:
Base (Tajine): The shallow, wide bottom provides maximum surface area for browning and even heat distribution. The slight concave shape naturally directs condensed steam toward the center.
Cone (Qadus): The tall, conical lid creates the circulation chamber. Its height determines the steam pressure—taller cones create more vigorous circulation.
Vent Hole: Not all tagines have this, but when present, it allows precise pressure control during cooking.
Chapter 2: Essential First Steps: Seasoning & Care
The Absolute First Step: Curing Your Clay Tagine
Tagine seasoning is crucial for preventing cracks and developing a natural non-stick surface. This process, called “curing,” strengthens the clay and prepares it for cooking.
Step-by-Step Seasoning Guide:
- Initial Soak (2-3 hours): Submerge both base and lid in cool water. This hydrates the clay and prevents shock when heated.
- Dry Completely (30 minutes): Allow pieces to air dry until no moisture remains on the surface.
- Oil Application: Rub unscented vegetable oil (avoid olive oil—it can go rancid) into all unglazed surfaces using a cloth.
- Oven Curing: Place in cold oven, set to 300°F (150°C), heat for 2 hours. This gradual temperature increase prevents thermal shock.
- Cool Gradually: Turn off oven, leave tagine inside until completely cool (2-3 hours).
Pro Tip: The oil polymerizes during heating, creating a protective layer that prevents food from sticking and strengthens the clay structure.
Daily Care & Cleaning: Preserving Your Investment
Never use dishwashers for clay tagines! The harsh detergents and high temperatures will damage the seasoning and potentially crack the clay.
Proper Cleaning Method:
- While Warm: Clean immediately after use with warm water and a soft sponge
- For Stuck Food: Create a paste with baking soda and water, let sit 10 minutes, then scrub gently
- Stubborn Stains: Use coarse salt as a gentle abrasive
- Drying: Air dry completely before storing
Storage Tips: Longevity Secrets
- Ventilation: Store with lid slightly ajar to prevent moisture buildup
- Odor Prevention: Place a small bowl of baking soda inside if storing long-term
- Temperature: Keep in consistent temperature environment—avoid basements or attics
- Protection: Wrap in soft cloth to prevent chips during storage
Common Seasoning Problems & Solutions
Q: My tagine cracked during seasoning—what went wrong? A: Usually caused by temperature shock. Ensure gradual heating and cooling, and always start with a soaked tagine.
Q: The seasoning feels sticky after curing. A: Too much oil was used. Lightly sand with fine-grit paper and re-season with less oil.
Chapter 3: Mastering Heat & Technique
The Foundation: Low and Slow Heat
The secret to exceptional tagine cooking lies in understanding heat dynamics. Unlike Western cooking methods that often use high heat for quick results, tagine cooking embraces patience. The science behind this approach reveals why:
When you cook at low temperatures (250-300°F), proteins break down slowly, collagen converts to gelatin gradually, and volatile compounds have time to develop complex flavor profiles. The steam circulation within the tagine creates a gentle, moist environment that prevents drying while intensifying tastes.
Stovetop Cooking: The Traditional Method
Essential Equipment: The Heat Diffuser
For clay tagines, a heat diffuser is mandatory. This metal plate distributes heat evenly and prevents hot spots that can crack your tagine.
Stovetop Technique:
- Start Low: Begin with the lowest heat setting
- Gradual Increase: Raise temperature slowly over 10-15 minutes
- Monitor Steam: Look for gentle steam escape—not vigorous bubbling
- Adjust as Needed: Reduce heat if liquid boils aggressively
Oven Cooking: The Hands-Off Approach
Oven cooking provides the most consistent results for beginners. The surrounding heat eliminates hot spots and maintains steady temperature.
Oven Method:
- Preheat: Start with a cold oven, gradually increasing to 325°F
- Placement: Use middle rack for even heat distribution
- Timing: Generally 1.5-2 hours for most recipes
- Check Sparingly: Open oven door minimally to maintain temperature
Ingredient Layering: The Art of Arrangement
Proper layering isn’t just about aesthetics—it’s about optimal cooking results.
The Perfect Layer Strategy:
Bottom Layer: Root vegetables (carrots, potatoes, turnips)
- Direct heat contact for caramelization
- Natural sugars develop rich flavors
- Provides base for other ingredients
Middle Layer: Proteins (chicken, lamb, fish)
- Benefits from surrounding moisture
- Proteins release juices that enhance vegetable flavors
- Protected from direct heat prevents overcooking
Top Layer: Delicate ingredients (herbs, soft vegetables, preserved lemons)
- Gentle steam cooking preserves textures
- Aromatics infuse into rising steam
- Easy to remove if cooking time varies
Liquid Ratios: Less is More
One of the biggest mistakes beginners make is adding too much liquid. Remember: ingredients release natural juices during cooking, and the tagine’s design minimizes evaporation.
General Rule: Use 1/2 cup liquid per pound of ingredients, adjusting based on:
- Ingredient moisture content
- Desired sauce thickness
- Cooking duration
The Lid Secret: Patience Pays Off
Resist the urge to peek! Each time you lift the lid:
- Steam escapes, requiring longer cooking time
- Temperature drops, disrupting the cooking process
- Flavor concentration decreases
When to Check: Only when recipe specifically calls for it, or if you smell burning.
Flavor Building: Beyond Basic Cooking
Searing for Depth
While not always traditional, lightly searing proteins before tagine cooking adds complexity:
- Creates Maillard reactions for rich flavors
- Develops appealing color
- Locks in juices
Aromatics Arsenal
Essential Spices:
- Ras el hanout (Moroccan spice blend)
- Ground ginger and cinnamon
- Turmeric for color and earthiness
- Saffron for luxury dishes
Flavor Enhancers:
- Preserved lemons (citrus brightness)
- Olives (brine complexity)
- Dried fruits (natural sweetness)
- Fresh herbs (bright finish)
Chapter 4: Troubleshooting Common Tagine Issues
Why Does My Tagine Crack?
Causes and Solutions:
- Too High Heat: Never exceed medium heat on stovetop
- No Seasoning: Proper curing prevents thermal stress
- Direct Flame: Always use heat diffuser with gas stoves
- Temperature Shock: Gradual heating and cooling prevents stress fractures
- Moisture Extremes: Don’t put hot tagine in cold water
My Food Burns or Sticks to the Bottom!
Troubleshooting Steps:
- Check Heat Level: Reduce to lowest setting that maintains gentle simmer
- Verify Diffuser: Ensure proper placement and size
- Add Liquid: Increase by 1/4 cup if contents look dry
- Seasoning Issue: Re-season base if sticking persists
- Ingredient Order: Place vegetables before proteins to create barrier
My Meat Isn’t Tender!
Common Causes:
- Insufficient Time: Tough cuts need 2-3 hours minimum
- Too High Heat: Boiling toughens proteins—maintain gentle simmer
- Frequent Peeking: Each lid lift extends cooking time
- Wrong Cut: Choose collagen-rich cuts (shoulder, thigh) over lean meats
- Liquid Loss: Ensure adequate moisture throughout cooking
My Tagine Dish is Watery or Bland!
Solutions:
- Reduce Liquid: Use less initially, let ingredients release natural juices
- Increase Browning: Sear proteins and sauté aromatics before adding liquid
- Concentrate Flavors: Remove lid during last 15 minutes to reduce sauce
- Season Properly: Add salt in layers throughout cooking process
- Spice Timing: Add robust spices early, delicate ones near end
My Tagine Smells of Old Food!
Cleaning Protocol:
- Deep Clean: Soak in warm water with baking soda paste
- Stubborn Odors: Fill with water and white vinegar solution, let sit overnight
- Re-season: May need light re-seasoning after deep cleaning
- Storage: Always completely dry before storing
My Tagine Lid Doesn’t Fit Snugly!
Understanding Fit:
- Handmade Variations: Slight gaps are normal in authentic tagines
- Thermal Expansion: Clay expands when heated, improving fit
- Damage Check: Inspect for chips or cracks affecting seal
- Functionality: As long as steam circulates properly, perfect fit isn’t necessary
Chapter 5: Advanced Tagine Tips & Pro Hacks
Serving from the Tagine: Etiquette and Practicality
Traditional Moroccan etiquette involves serving directly from the tagine, creating a communal dining experience. Here’s how to do it right:
- Temperature Management: Keep tagine warm on lowest heat setting
- Presentation: Place on decorative trivet or heat-resistant surface
- Utensils: Provide long-handled spoons to reach all areas
- Bread: Offer fresh flatbread for scooping—part of authentic experience
Making Tagine “Next Day”: Flavor Development
Many tagine dishes improve overnight as flavors meld:
- Cool Completely: Before refrigerating in tagine
- Gentle Reheating: Use low heat with splash of liquid
- Flavor Adjustment: Taste and adjust seasoning before serving
- Herb Refresh: Add fresh herbs during reheating
Batch Cooking & Freezing Strategies
Freezer-Friendly Preparations:
- Cook ingredients 75% through before freezing
- Freeze in portions suitable for your tagine size
- Add fresh herbs and final seasonings after thawing
- Use within 3 months for best quality
Experimenting with Spices: Building Complex Profiles
Spice Layering Technique:
- Base Layer: Cumin, coriander, turmeric (earthy foundation)
- Middle Layer: Cinnamon, ginger (warming spices)
- Top Layer: Saffron, rose petals (delicate aromatics)
Heat Management for Spices:
- Bloom whole spices in oil before adding other ingredients
- Add ground spices to prevent burning
- Fresh herbs should be added in final 10 minutes
Community Tips Section
Share your tagine discoveries! Tag us @cookingwithtagines to showcase your creations and inspire fellow cooks.
Reader Favorite Hacks:
- Use parchment paper collar around base edge to prevent sticking
- Freeze lemon slices in ice cube trays with herbs for instant flavor boosters
- Create spice sachets with cheesecloth for easy removal
- Double-layer aluminum foil as emergency diffuser substitute
Conclusion: Your Tagine Journey Begins
Mastering tagine cooking is about embracing patience, understanding your equipment, and respecting traditional techniques while making them your own. The key takeaways—proper seasoning, low heat, strategic layering, and minimal interference—will serve you well as you explore this ancient cooking method.
Remember that every tagine tells a story through its flavors, and each cooking session builds your skills and confidence. Start with simple recipes, focus on technique over complexity, and gradually experiment with spice combinations and ingredient variations.
Your tagine is more than cookware—it’s a gateway to experiencing one of the world’s most sophisticated culinary traditions. Whether you’re preparing a simple weeknight dinner or entertaining guests with an elaborate feast, these tagine cooking tips will help you create memorable meals that celebrate the rich heritage of Moroccan cuisine.
Ready to start your tagine adventure? Share your first tagine creation on social media using #MyTagineJourney, and subscribe to our newsletter for exclusive recipes, seasonal cooking tips, and advanced techniques that will elevate your culinary skills to new heights.